Showing posts with label Christmas. Show all posts

Wednesday, December 11, 2013

Hand Santa-tizer Packages

Happy Wednesday Crafty Friends!!

Kendra here from Luv 2 Scrap N' Make Cards!

This week it is all about 3D Christmas!!
So exciting!

I knew exactly what I wanted to create!!

When I got the Oh, Christmas Puns sets I was so excited to see the "Hand Santa-tizer Santa Tested/Elf Approved" sentiment!

I knew at one point this holiday season I would have to create some of my mini hand sanitizer packages! 


Aren't they cute?!?!


A side-view to see the mini hand sanitizer:

I just love these little bottles from Bath and Body Works!

Makes for a nice little gift!

I have some girl friends coming over this week, so I thought it would be fun to create these for them!!

Perfect sentiment for these packages:

The adorable Santa:
How fun!!

----------
A look at the stamp set used:

Oh, Christmas Puns


Check out all of Joy's Life Stamps here!

You can check out my blog post here.

Have a wonderful day!!

~ Kendra ~


Wednesday, December 4, 2013

Snowflake Flurry

Happy Wednesday Crafty Friends!!

Kendra here from Luv 2 Scrap N' Make Cards!

This week it is all about Christmas Cards!
Not a problem, as I am still creating cards to send/hand out!!

I got out the lovely Oh, Christmas Puns set, as I love the "Wishing You a Flurry of Joyful Surprises" sentiment!
 I just love the white, blue and silver!


Check out the fun sentiment:
I stamped most of the sentiment with a dark blue, but masked the "Flurry" so I could stamp that with VersaMark Ink and then emboss with Silver Embossing Powder

Perfect with the die cut snowflakes!!


----------
A look at the stamp sets used:

Oh, Christmas Puns


Check out all of Joy's Life Stamps here!

You can check out my blog post here.

Have a wonderful day!!

~ Kendra ~


Tuesday, November 19, 2013

Warm Decemberrr Wishes

Hello everyone! Laura here from Laura's Crafts & More...This week the DT is all about Christmas!! Yes it's that time of year again! My card today uses "Warm Decemberrr Wishes" from Wintery Puns. 

I used a Snowflakes embossing folder and added some Star Dust Stickles to make it all sparkly! The branch is a die cut that I inked with Gathered Twigs distress ink and the bird is a "button" from my stash. I also used Distress Stickles for the "snow" on the branch.  


To see ALL of Joy's amazing stamp sets and to see her awesome bundle prices click HERE! 

Thanks for stopping by and stop by my blog anytime to see more details! 

Wednesday, October 9, 2013

Christmas - Ombre Style

Happy Wednesday Joy's Life Stamp Friends! 

Kendra here from Luv 2 Scrap N' Make Cards to share a fun project with you!

This week we are creating projects based on the "Ombre" style!

At first I had no clue what that was!
So after looking it up a few times, as Julie mentioned the other day it i
"the French word for color that is shaded or graduated in tone."

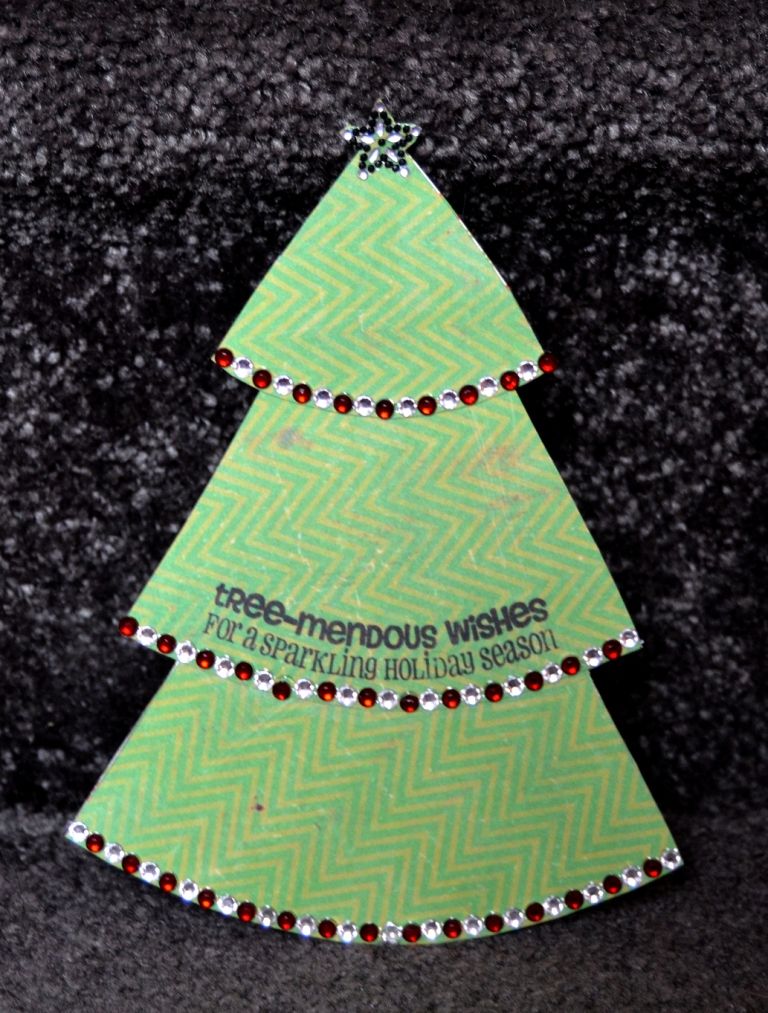
Call me CRAZY, but I have really started getting into the holiday spirit!  So I've been creating a lot of Christmas cards!

So with the "Ombre" style in mind, I decided I wanted to create a Christmas card with a tree on it using the fun
"tree-mendous wishes for a sparkling holiday season" sentiment from the Oh Christmas Puns set!!

I used my Cricut to cut out the fun holiday tree, in which I used 3 green colors of cardstock to get the "Ombre" style!


And I obviously had to add a lot of bling to give it that perfect "sparkle"!!


Have a wonderful day!!


Thursday, December 20, 2012

Best Friend Snowman Wishes

Hello Crafters,
it's Kimberly from hellocutiecrafts here.
This week were are Glittery and Bright on the Joy's Life Design Team.
  I made a fun Bright and Glittery card and Hershey Tree for my Best Friend!


Just look at that fun glitter and bright colors!!

I used Joy's Life Holiday Occasions for the Merry Christmas, My Sweet Friend and Best Friend.
Thanks for stopping by and I hope everyone is enjoying the Awesome glittery and Bright projects on the blog this week.
For all the details stop by my blog.
Have a wonderful day! 

Tuesday, December 18, 2012

Dear Santa I am... Definitely Goodish

 Hi!! This is Jennie from Earthy Scrap!!
This week in Joy's Life we are doing 
Glittery and Bright Projects!!
I am sharing the only December Daily page I have done.
I still need to print some pictures but the great thing about this story is the absence of a photos. 
I took my daughter to take a photo with Santa and it kinda failed LOL


 Since I have no real photo of Santa 
I got this one from a K & Company paper. 

 On my fake Polaroid I used a sentiment 


I hope you enjoyed this post!!
Take Care!!

Saturday, December 15, 2012

Using the negative of a die-cut

Hello! This is Patty from the Crafty Kitten with my technique for the week.  I'm going to show you how to use a die cut in a different way.

I turned to my trusty Cameo for this project.  Using the drawing tool, I made a rectangle the size that I needed.


Using one the of tree files available in the Silhouette online store,  I  enlarged, centered it in the rectangle, and then cut it from white card stock.


I marked the green card stock where the tree would be positioned and began to cover the background with Washi  tape.  (If you are in a big hurry, you can use printed card stock.)


It was at this point that I realized the tape was semi-transparent and the green card stock was showing through.  I changed plans and used the white die cut as a base to lay the tape so the true color of the Washi tape showed through. 


I used the pencil marks to place the tree onto the card.  Afterwards, I taped the stamped frame to the card and added the glitter star.  This is how it looks after it is assembled.  

I chose this stamp from Joy's new Oh, Christmas Puns for my card.  Works perfectly!


Well, I hope you enjoyed this quick tutorial.  If you decide to try this, with all the beautiful Washi Tape and papers out there now, I think you'll be happy with the results!

Thursday, December 13, 2012

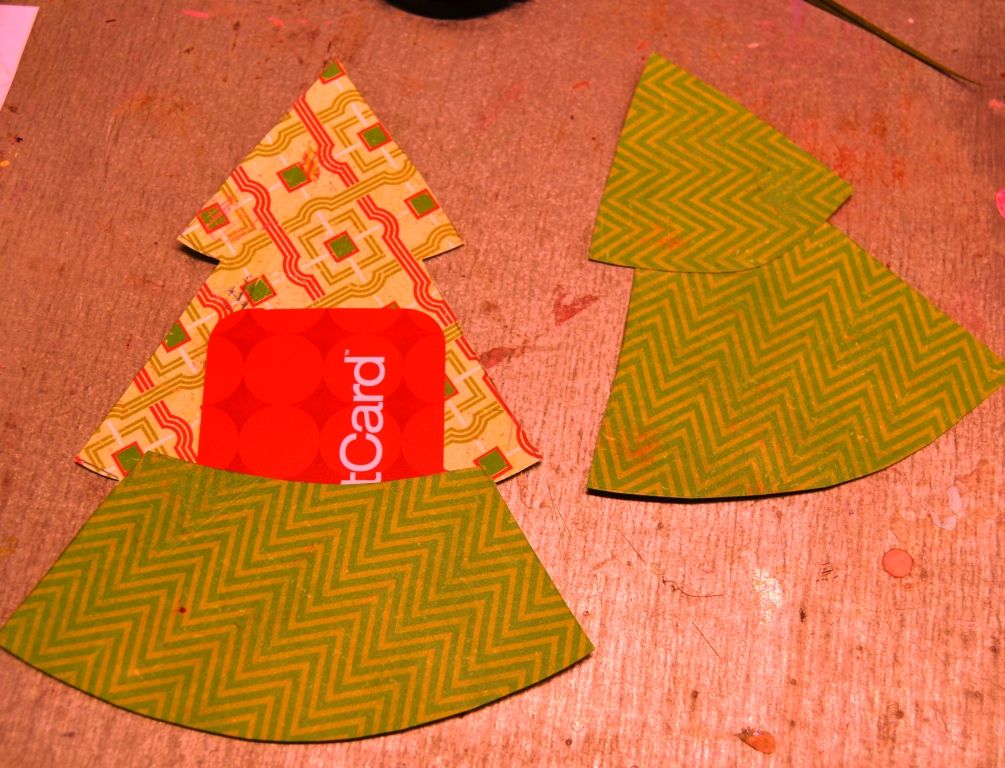
Christmas Tree Gift Card Holder tutorial

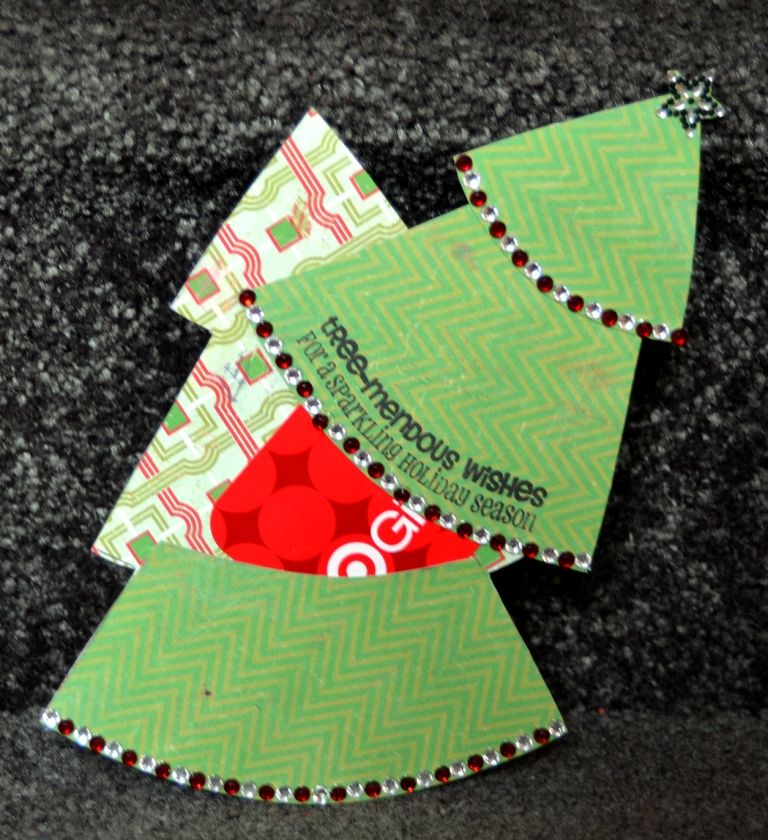
Today I am going to show you how to make a simple Christmas tree shaped gift card holder.
Here you can see where the gift card is hidden in the finished card.
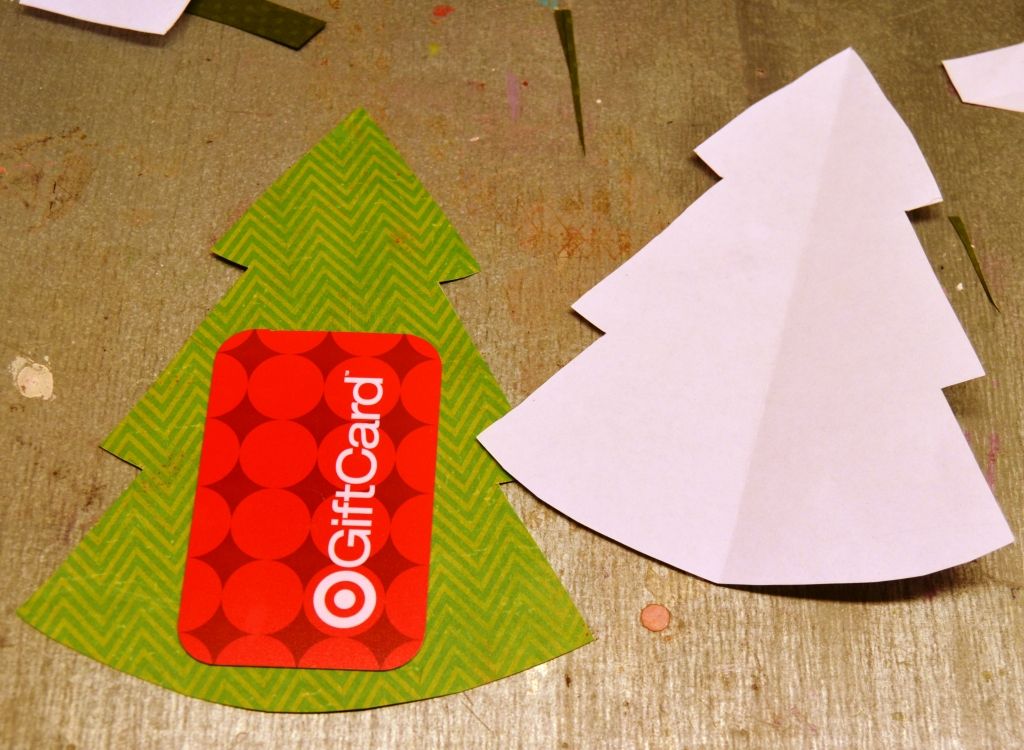
First, I cut a piece of scrap paper into a 5x7 rectangle. That's the size envelope that I wanted my finished card to fit in. fold that paper in half, sketch the tree on it - using up as much space as possible, and then cut out the template.

Trace the template onto your chosen patterned paper to create the back of the card.

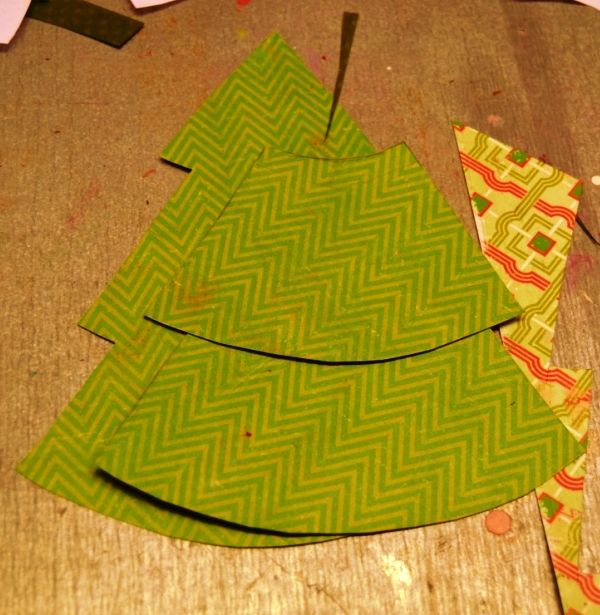
Then you want to cut the template into the three tiers of the tree. Trace those tiers onto your patterned paper, but be sure to extend the top edge of the bottom two tiers by about a half inch to allow for an overlap and adhesive.


Glue the top two tiers together. Glue the bottom tier to the back of the card using adhesive just on the sides and bottom to create a pocket.


Finally, add a little adhesive to the back of the top part of the tree so that it sticks to the gift card. Then have fun embellishing!


Tuesday, December 11, 2012

Merry Curling!!


 Hi!! This is Jennie from Earthy Scrap!!
This week at Joy's Life we are giving you 
tips and techniques for your projects!!
I have a tutorial for the Christmas Tree 
I used on the card below.

See?? I promise it will be cute and easy!! 

This sentiment is from the Wintery Puns Stamp Set.

Here is the tutorial.


I hope you enjoyed the tutorial!!
Take Care!!
To check out more tips and techniques check out

Saturday, December 8, 2012

Wintery Cocoa Pouch

Hi!  It's Patty here from the Crafty Kitten.  

If you've been following the Design Team blog this week you've seen that we've been doing food projects. You've already seen some really neat treat boxes and candy jars.  

I've got for you a simple cocoa pouch that you could whip up in a few minutes. 


Open it up for a hot chocolate treat! 

I used Joy's Wintery Puns for this project.  It has quickly become one of my favorite sets!  You can get yours here, if you don't already have it!


Would you like to create some last minute gifts like this?   Drop by my blog for details on how I created this fast treat!

Friday, December 7, 2012

Warm Decembrrr Wishes!

TGIF everyone!  It's Sarabeth from Chronicles of Sarita and it's my turn to share with you an easy peasy gift box with a yummy treat to keep that special someone nice and warm this holiday season!  I am definitely going to be making a few more of these to hand out!  Check it out:

(top of box)

 Here is a close up of the adorable "Warm Decembrrr Wishes" stamp found in the Joy's Life Wintery Puns stamp set:

 For more details on my project, stop on by my blog Chronicles of Sarita.
Don't forget to keep scrolling to check out the rest of the DT's awesome creations too!


Enjoy your weekend and Happy Scrappin'!!!!!

Tuesday, December 4, 2012

Stay Toasty Cookies!!


Hello!! This is Jennie from Earthy Scrap!!
This week we are inspired by Food!! 
I decorated this paper bag to put some cookies in it.
I used Recollections Paper and Border Punch 
and a digi from Angie Delarie.
I colored her with Tombow Dual Brush Pens.

The sentiment is from Wintery Puns

I better stay away from cookies... Yeah right!!
I hope you liked it!!
Take Care!!