Thursday, December 13, 2012

Thank you SNOW much

Hello everyone! Laura here from Laura's Crafts & More...This week the DT is showing off some tips & techniques that we love! Ok so today is not my "normal" day to post for Joy's Life DT but when I went to write my post on Monday night...my blog was GONE!!! I was freaking out! SO I put a call into my Comp Tech guy AKA my brother :) and he said he was "moving the domain..." but all I heard was blah, blah blah...kind of like Charlie Brown's teachers!! Needless to say he fixed it and I am back up & running! Yay!! :) SO now for my technique! 

I am doing a "new to me" technique that I just fell in love with! It is called "Glazed Window" (I seriously meant to take WAY more pics, but I started and kept forgetting about taking pics! Not used to doing that!!) You will need: Acetate, Glossy Accents, Re-inkers, Dry Glitter and Tissue Paper


Squeeze out about a quarter size circle of Glossy Accents and add a few drops of re-inkers....You can see the colors I used here

Next, I used my most versatile & handy tool in my craft room...my finger!! Get in there and get messy!! Rub it all around making sure the edges are covered also.

Then sprinkle some glitter over all the "goo"! I used silver here but clear also looks good too!


Next, crinkle up a sheet of cut to size tissue paper, then straighten it out and place it over all your "goo"


With your fingers again, tap all around the tissue paper until it's all pressed down.

Let dry (this could take a while depending on how much Glossy Accents you used)...then trim access tissue paper off the edges.

Adhere to a white piece of cardstock (I used 4 1/4" x 5 1/2") adding the white behind really makes your colors pop but experiment with other colors too! Now finish your card...


And here is a close-up of the super cute stamp!! 


To see all of Joy's amazing products please visit Joy's blog HERE...


Thanks for visiting & let me know if you tried this! :) 

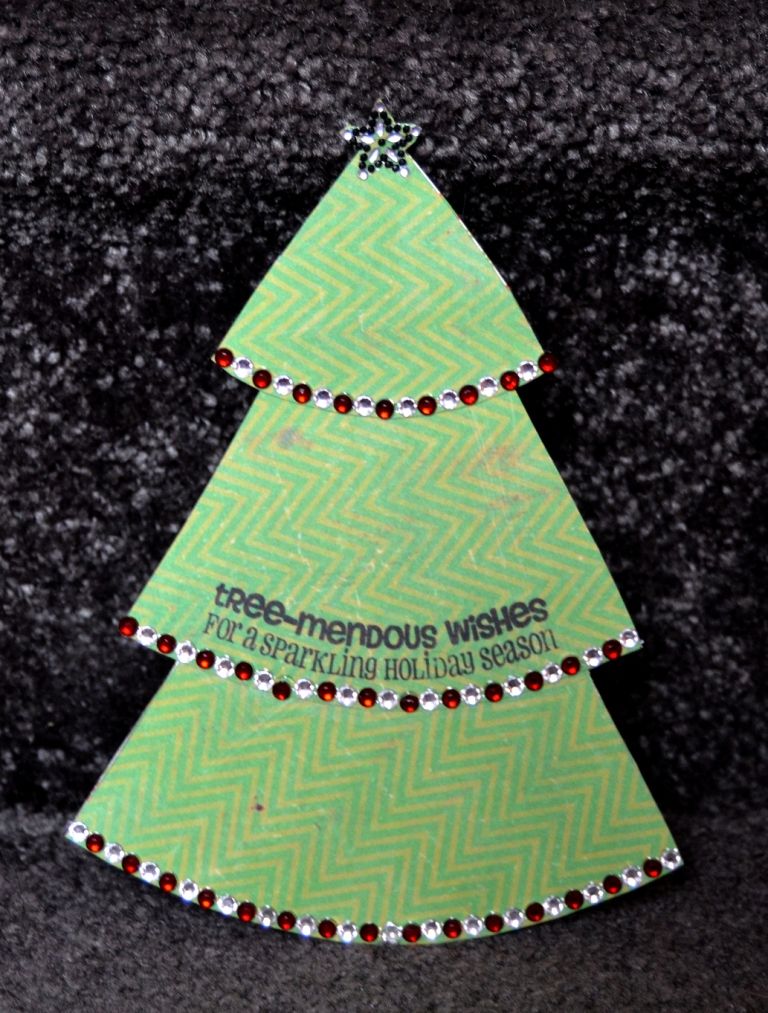
Christmas Tree Gift Card Holder tutorial

Today I am going to show you how to make a simple Christmas tree shaped gift card holder.
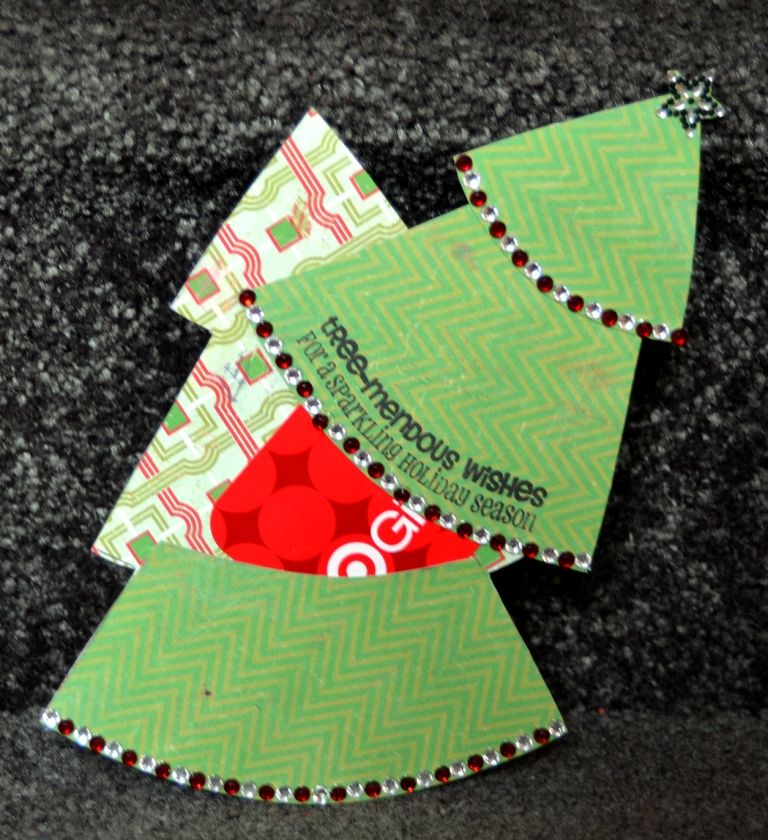
Here you can see where the gift card is hidden in the finished card.
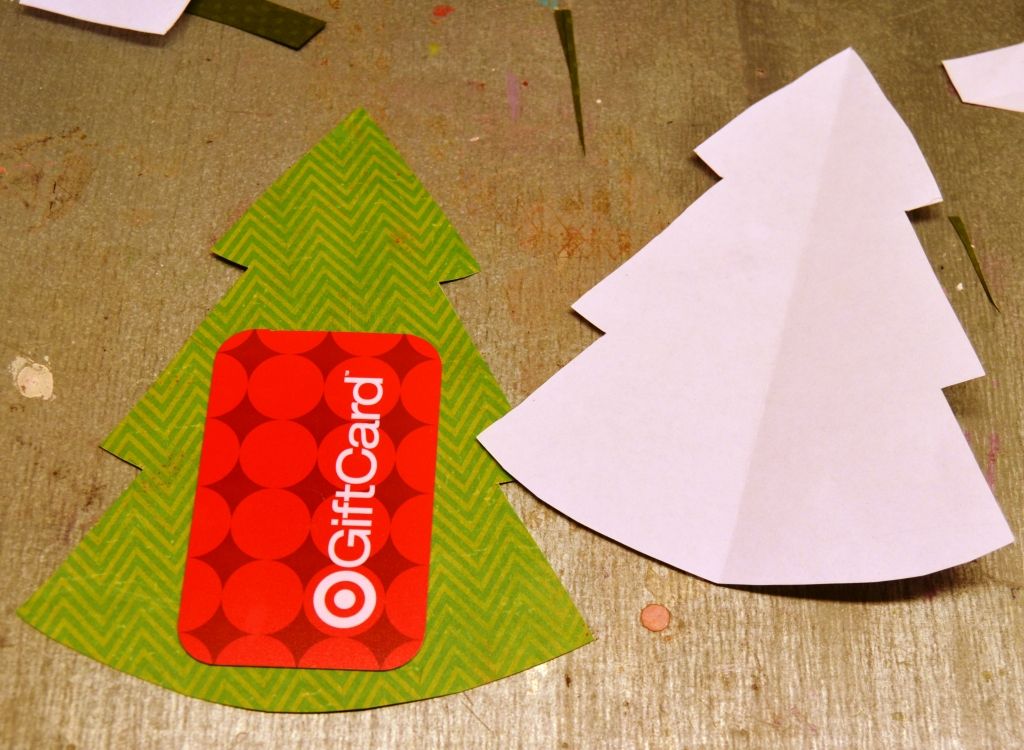
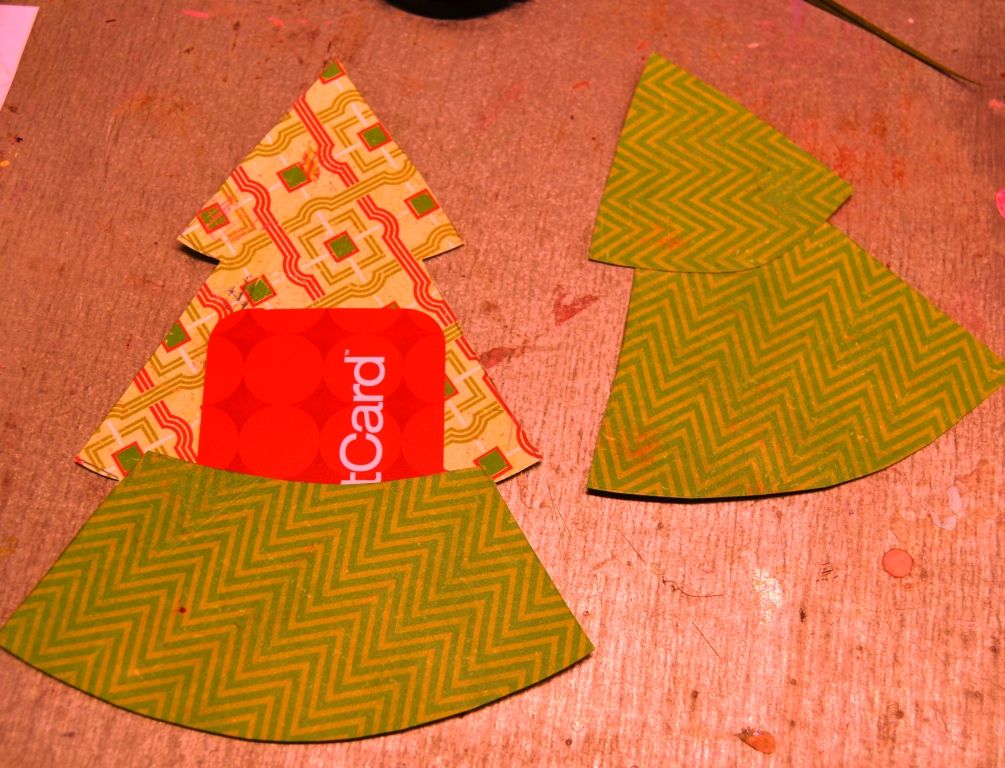
First, I cut a piece of scrap paper into a 5x7 rectangle. That's the size envelope that I wanted my finished card to fit in. fold that paper in half, sketch the tree on it - using up as much space as possible, and then cut out the template.

Trace the template onto your chosen patterned paper to create the back of the card.

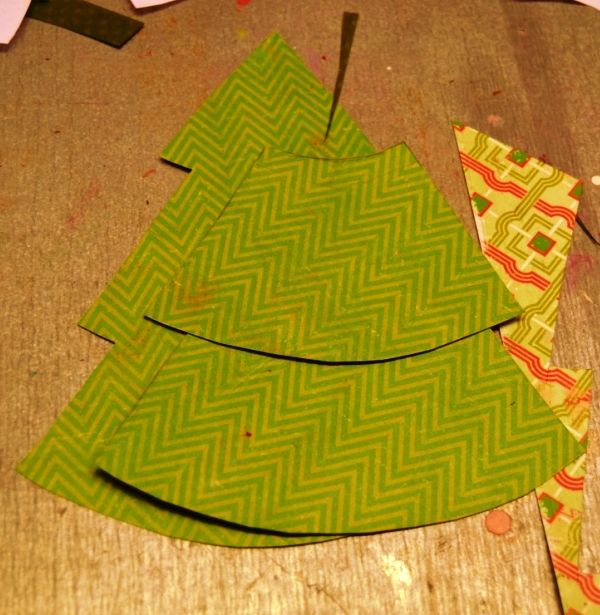
Then you want to cut the template into the three tiers of the tree. Trace those tiers onto your patterned paper, but be sure to extend the top edge of the bottom two tiers by about a half inch to allow for an overlap and adhesive.


Glue the top two tiers together. Glue the bottom tier to the back of the card using adhesive just on the sides and bottom to create a pocket.


Finally, add a little adhesive to the back of the top part of the tree so that it sticks to the gift card. Then have fun embellishing!


Ribbon Scraps Bow

Hi Everyone! 
Kimberly, from hellocutiecrafts 
with a my technique this week to use up those 
ribbon scraps that seem to pile up 
but you just can't throw them away!
How about making a fun bow to add to a card, 
goodie bag, package or gift?

I added my ribbon scrap bow to a Kraft bag,
that is big enough to hold a gift card and some candy or small treat.
 

I used the Joy's Life Holidays Occasions Stamp Set here.
Make sure to stop by the blog all this week for great tips and techniques.
For the details on how to make the ribbon scraps bow, 
stop by my blog.
Have a wonderful day!

Wednesday, December 12, 2012

Peek a-boo bear and embossing technique

Hello crafters... it's Lori with got2bcrafting!
I am super excited to be sharing my project with you today. Not only am I sharing my card, but also a little embossing technique, you may or may not have seen before. :)
First, here is my card:
Did you notice the embossed background??
 This look is accomplished by using white core cardstock and a sanding block.
I used my Cuttlebug to emboss the cardstock:

And the final look after sanding:

I used Joy's "Oh Christmas Puns" for the adorable sentiment:
Aren't those fonts amazing??

You can check out all of Joy's stamps and crafting supplies here.

For more information, you can visit my blog.

Thanks for stopping by today.
HAPPY HOLIDAYS!!!

Peace Hope & Joy!

Happy Wednesday!
here to show you my project for this week.

All this week, the Joy's Life Design Team has been showing you projects that showcase Joy's awesome stamps as well as a certain technique. 

For my technique, I chose to drag out my sewing machine and stitch on my card:

I am definitely not a seamstress and I do not know much about sewing machines, I'm surprised I even have one to be perfectly honest lol! But I do love the look it gives to my paper projects when I use it to sew on them.
As you can see from my photo, my stitching is anything but straight but that's ok. I think it gives it more character ;)

I used this awesome little sentiment from the Wintery Puns stamp set for my project:

So cute! I love the font and I think it went perfectly with my card.

You can see all of Joy's products HERE

You can see more info about my project on my blog, HERE

I hope you have a fabulous crafty day!